 Skip to content

Clean, well-maintained tiles can make a kitchen, bathroom, living room, or commercial floor look brighter and more inviting. However, when tiles begin to look dull, many people immediately search for a “tile polish” without first identifying the tile material, its finish or the actual cause of the dullness.
That distinction matters.
A glazed ceramic tile, polished porcelain floor, marble surface, and unsealed natural-stone tile may look similar, but they do not respond to the same cleaning chemicals or polishing methods. In some cases, the correct solution is a surface polish. In others, the tile only needs residue removal, grout cleaning, sealing, or professional mechanical restoration.
This guide explains what tile polish is, when it should be used, which products suit different surfaces, how much tile-polishing products cost in Pakistan, and how to restore shine without damaging the floor.
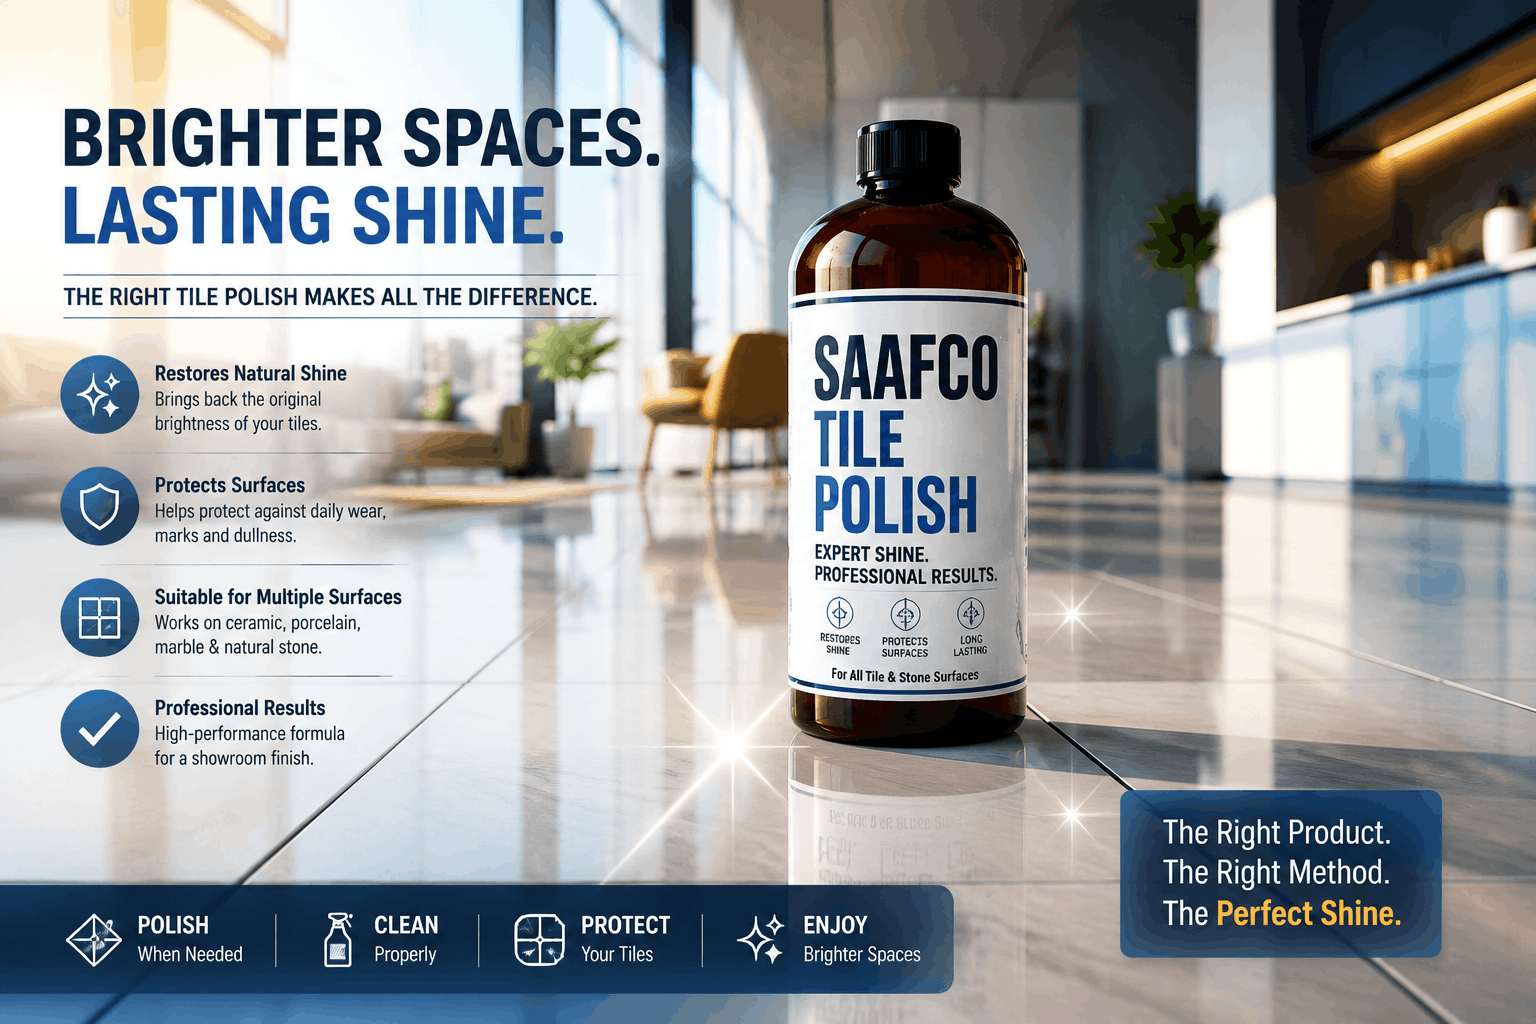
Tile polish is a surface treatment used to enhance or restore gloss on compatible floors. It is not suitable for every tile. Glazed ceramic and porcelain usually need correct cleaning rather than routine polishing, while marble and other natural stones may require stone-specific polishing compounds or professional mechanical restoration.
What Is Tile Polish?
“Tile polish” is a broad market term used for several different products and processes. Depending on the product, it may refer to:
- A film-forming floor finish that adds temporary gloss
- A liquid or cream shiner applied and buffed by hand
- A protective coating for compatible sealed floors
- A polishing compound for marble or natural stone
- A professional mechanical process that smooths and restores stone
- A factory finish already present on polished porcelain
These treatments are not interchangeable.
A maintenance polish may leave a thin layer over a compatible floor, improving gloss and making minor surface dullness less visible. It does not normally repair deep scratches, cracked glaze, worn tile patterns or serious stone etching.
Natural-stone polishing is different. Marble and similar stones may require polishing powders, abrasives, honing pads or professional equipment to restore the actual surface. The Natural Stone Institute recommends professional re-polishing for deeper scratches and etching that cannot be corrected through basic maintenance.
Tile Polish Is Not the Same as Polished Tile
One of the most common sources of confusion is the phrase polished porcelain tile.
Polished porcelain is generally created during manufacturing by mechanically treating the porcelain surface. Atlas Plan describes the process as polishing ceramic material with a diamond disk to produce a smooth, high-gloss finish. This factory finish is part of the tile itself; it is not the same as applying bottled floor polish at home.
Therefore, a dull polished-porcelain floor does not automatically need another coating. Its appearance may be affected by:
- Soap or detergent residue
- Dirty mop water
- Hard-water deposits
- Grease
- Dust trapped in surface texture
- Worn or stained grout
- Fine scratches
- Incompatible cleaning chemicals
Manufacturer care guides typically prioritise correct cleaning, rinsing and surface-compatible products rather than routine waxing of ceramic or porcelain floors.
Why Tiles Lose Their Shine
Tiles can look dull even when the original finish is still intact.
Detergent and Soap Residue ss
Using too much cleaner can leave a film that attracts soil and causes streaks. Crossville warns that higher detergent concentrations can make rinsing more difficult, summarising the principle as: “More is not always better.”
Dirty Mop Water
Repeatedly using contaminated water redistributes grease and fine particles across the floor. Daltile’s maintenance advice is direct: “Never mop with dirty water.”
Hard-Water Deposits
When mineral-rich water evaporates, it can leave white marks, cloudy deposits or streaks. These are particularly noticeable on dark, glossy tiles and around bathroom fixtures.
Kitchen Grease
Oil vapour and cooking residue can settle on floors, splashbacks and wall tiles. In Pakistani kitchens, frequent frying and spice-based cooking may create a sticky layer that traps dust and makes glossy tiles appear flat.
Abrasive Dust
Sand, outdoor soil and fine construction particles can behave like abrasives under shoes, mops and furniture. Dry soil should therefore be removed before wet cleaning or polishing.
Damaged or Worn Finish
Deep scratches, chemical etching, worn glaze and damaged stone cannot always be corrected with a bottled shiner. These conditions may require resurfacing, honing, re-polishing or replacement.
Tile Polish vs Tile Cleaner vs Sealer vs Wax
| Product or process | Main purpose | What it does not necessarily do | Typical use |
| Tile cleaner | Removes dirt, grease and residue | Does not create a permanent new finish | Routine cleaning |
| Tile polish or floor finish | Adds or refreshes surface gloss | Does not repair serious structural damage | Compatible sealed floors |
| Tile sealer | Reduces stain absorption | Does not always add shine | Porous tile, grout or selected polished porcelain |
| Wax | Creates a sacrificial surface film | May not suit glazed ceramic or porcelain | Only where manufacturer permits |
| Stone polishing compound | Restores natural-stone lustre | Not intended for ordinary glazed tile | Marble and compatible stone |
| Mechanical polishing | Physically refines the surface | Requires equipment and skill | Marble, terrazzo and selected stone floors |
A sealer and a polish perform different jobs. Sealers penetrate or protect absorbent surfaces, while many polishes form a visible film or enhance gloss. Some polished porcelain products may require sealing, particularly where the manufacturing process has exposed microscopic pores, but recommendations vary by tile and manufacturer. Aqua Mix and other tile-care specialists advise selecting sealers according to the exact porcelain finish and installation conditions.
Do All Tiles Need Polish?
No. The safest decision depends on the material and finish.
Ceramic Tiles
Most glazed ceramic tiles already have a fired surface finish. When they look dull, deep cleaning and thorough rinsing should usually be considered before adding a coating.
Suitable care generally includes:
- Soft sweeping or vacuuming
- Warm water
- A compatible mild or pH-neutral cleaner
- Microfiber or flat mopping
- Fresh rinse water
- Complete drying
Home Depot recommends warm water or a small amount of mild dish soap for ceramic tile, while stressing the importance of using fresh water and cleaning one section at a time.
Avoid applying wax or polish unless both the tile manufacturer and polish label confirm compatibility.
Porcelain Tiles
Porcelain is denser and generally more water-resistant than standard ceramic tile, but its surface can be glazed, matte, textured, honed or polished. Each finish may require different care.
For routine porcelain care, Porcelanosa recommends a mild, pH-neutral detergent and rinsing with clean water. Strong residues or unsuitable coatings may create streaking rather than improving the original appearance.
A polished porcelain tile may occasionally require a suitable sealer, especially if the manufacturer specifies one. It should not be treated with wax or a generic marble polish automatically.
Marble Tiles
Marble is a natural calcium-based stone that can be etched by acids. Vinegar, acidic bathroom cleaners, and some limescale removers can dull the surface instead of restoring it.
The Natural Stone Institute recommends neutral stone cleaner, stone soap, or a mild liquid detergent used at the correct concentration. It also advises rinsing thoroughly and drying with a soft cloth.
Light surface dullness may respond to a marble-specific polishing product. Deeper scratches, widespread etching, or uneven wear generally require professional honing and re-polishing.
Granite Tiles
Granite is usually more acid-resistant than marble, but the stone may contain acid-sensitive minerals and should still be cleaned conservatively. Neutral stone cleaner and manufacturer-approved polishing products are safer choices than generic acidic mixtures.
Matte and Anti-Slip Tiles
Matte, textured, and anti-slip tiles are not designed to develop a mirror-like gloss. Applying a shiny film may:
- Alter the intended appearance
- Accumulate inside surface texture
- Become difficult to remove
- Affect traction
- Produce patchy results
The objective with these surfaces should be cleanliness and uniformity rather than artificial gloss.
Outdoor Tiles
Outdoor tiles face soil, rain, pollution and weather exposure. Before using polish, confirm that the product is designed for exterior use, UV exposure and changing temperatures.
Film-forming indoor polish may peel, become slippery or trap moisture when used outdoors.
Types of Tile Polish Available in Pakistan
Liquid Floor Polish
Liquid polish is normally spread in a thin layer using an applicator pad or microfiber tool. It is convenient for large, compatible floor areas and may provide an even gloss when used correctly.
Bona’s tile-polishing instructions, for example, involve placing polish on a small floor section and spreading it with a microfiber applicator pad. This demonstrates why product-specific instructions matter: application technique is part of the coating system.
Cream or Paste Shiner
Cream and paste products are often marketed for marble, granite, quartz, and selected tile surfaces. They may be rubbed in and buffed with a soft cloth.
A Pakistani Tile Polishing expert instructs users to remove dust, apply a small amount to a dry cloth, rub gently, and buff after brief drying. That method is suitable only when the listed surface and product instructions match the floor being treated.
Spray Polish
Spray formulas are designed for light application or small areas. They may be convenient for wall tiles, counters, or touch-ups, but overspray can create unevenness on floors.
Polymer Floor Finish
Commercial floor finishes can create a stronger sacrificial film. They may require:
- Several thin coats
- Controlled drying time
- Periodic burnishing
- Future stripping and recoating
- Slip-resistance assessment
These products are more suitable for trained cleaners and compatible commercial flooring than for casual household experimentation.
Stone Polishing Powder
Stone powders are used for marble and selected natural stones. They react with or mechanically refine the surface and require correct pads, speed, moisture and technique.
A stone polishing powder should not be used on ordinary glazed ceramic tile.
Professional Mechanical Polishing
Floor-polishing machines use specialised pads or abrasives to restore marble, terrazzo, granite and other suitable materials.
This service may be appropriate where:
- The floor has deep scratches
- Marble is etched
- The surface is uneven
- Gloss has worn away across traffic lanes
- Previous coatings must be removed
- Hand polishing produces inconsistent results
How to Choose the Best Tile Polish in Pakistan
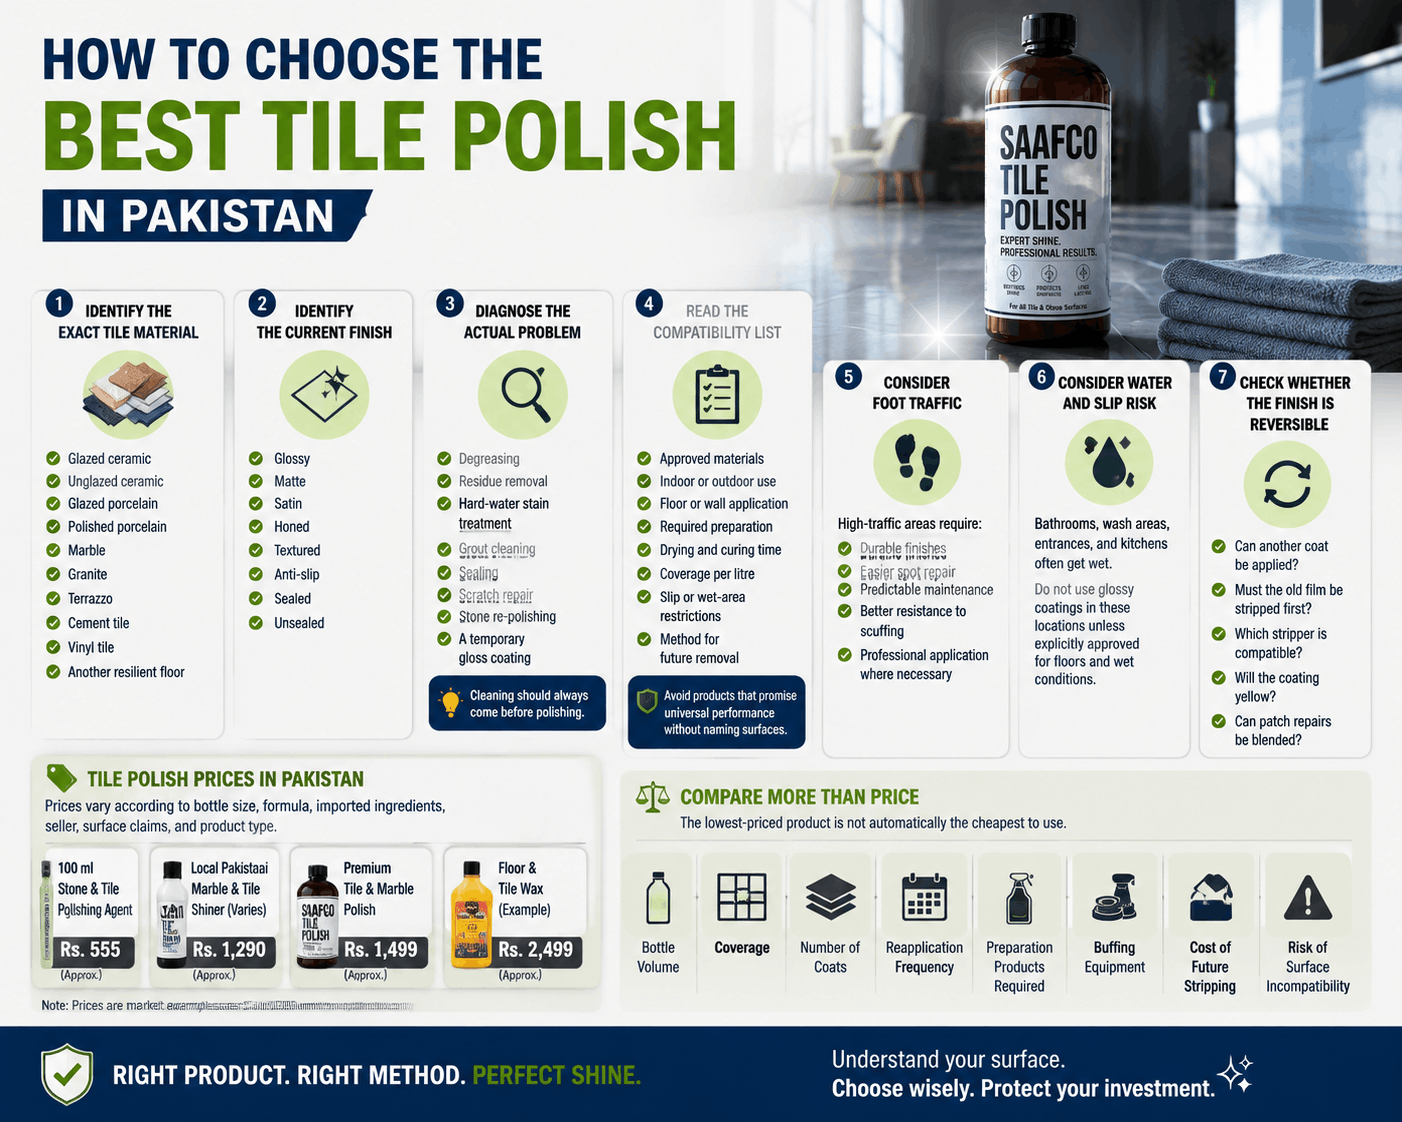
1. Identify the Exact Tile Material
Do not rely only on appearance. Confirm whether the surface is:
- Glazed ceramic
- Unglazed ceramic
- Glazed porcelain
- Polished porcelain
- Marble
- Granite
- Terrazzo
- Cement tile
- Vinyl tile
- Another resilient floor
A product marketed for “tile and marble” is not automatically suitable for every material.
2. Identify the Current Finish
Determine whether the original finish is:
- Glossy
- Matte
- Satin
- Honed
- Textured
- Anti-slip
- Sealed
- Unsealed
Applying gloss polish over a matte or anti-slip floor can change both appearance and performance.
3. Diagnose the Actual Problem
Ask whether the floor needs:
- Degreasing
- Residue removal
- Hard-water stain treatment
- Grout cleaning
- Sealing
- Scratch repair
- Stone re-polishing
- A temporary gloss coating
Cleaning should always come before polishing. A coating applied over dirt, grease or soap film can seal the defect beneath the finish.
4. Read the Compatibility List
A suitable label should clearly identify:
- Approved materials
- Indoor or outdoor use
- Floor or wall application
- Required preparation
- Drying and curing time
- Coverage per litre
- Slip or wet-area restrictions
- Method for future removal
Avoid products that promise universal performance without naming compatible surfaces.
5. Consider Foot Traffic
A lightly used bedroom floor and a busy shop entrance have different needs.
High-traffic areas require:
- Durable finishes
- Easier spot repair
- Predictable maintenance
- Better resistance to scuffing
- Professional application where necessary
6. Consider Water and Slip Risk
Bathrooms, wash areas, entrances, and kitchens frequently become wet. Never use a glossy coating in these locations unless it is explicitly approved for floors and the intended wet conditions.
7. Check Whether the Finish Is Reversible
Film-forming polish eventually wears. Before buying, ask:
- Can another coat be applied?
- Must the old film be stripped first?
- Which stripper is compatible?
- Will the coating yellow?
- Can patch repairs be blended?
Tile Polish Prices in Pakistan
Prices vary according to bottle size, formula, imported ingredients, seller, surface claims, and whether the product is a simple shiner or a professional coating.
A July 2026 market snapshot found examples including:
- A 100 ml stone and tile polishing agent listed around 555
- A Local Pakistani brand sells marble and tile shiner from approximately 1,290
- A premium tile and marble polish listed around 1,499
- A floor-and-tile wax listing around 2,499
These examples are not directly comparable because their quantities, chemistry, intended surfaces, and performance claims differ. Prices can also change without notice.
The lowest-priced product is not automatically the cheapest to use. Compare:
- Bottle volume
- Coverage
- Number of coats
- Reapplication frequency
- Preparation products required
- Buffing equipment
- Cost of future stripping
- Risk of surface incompatibility
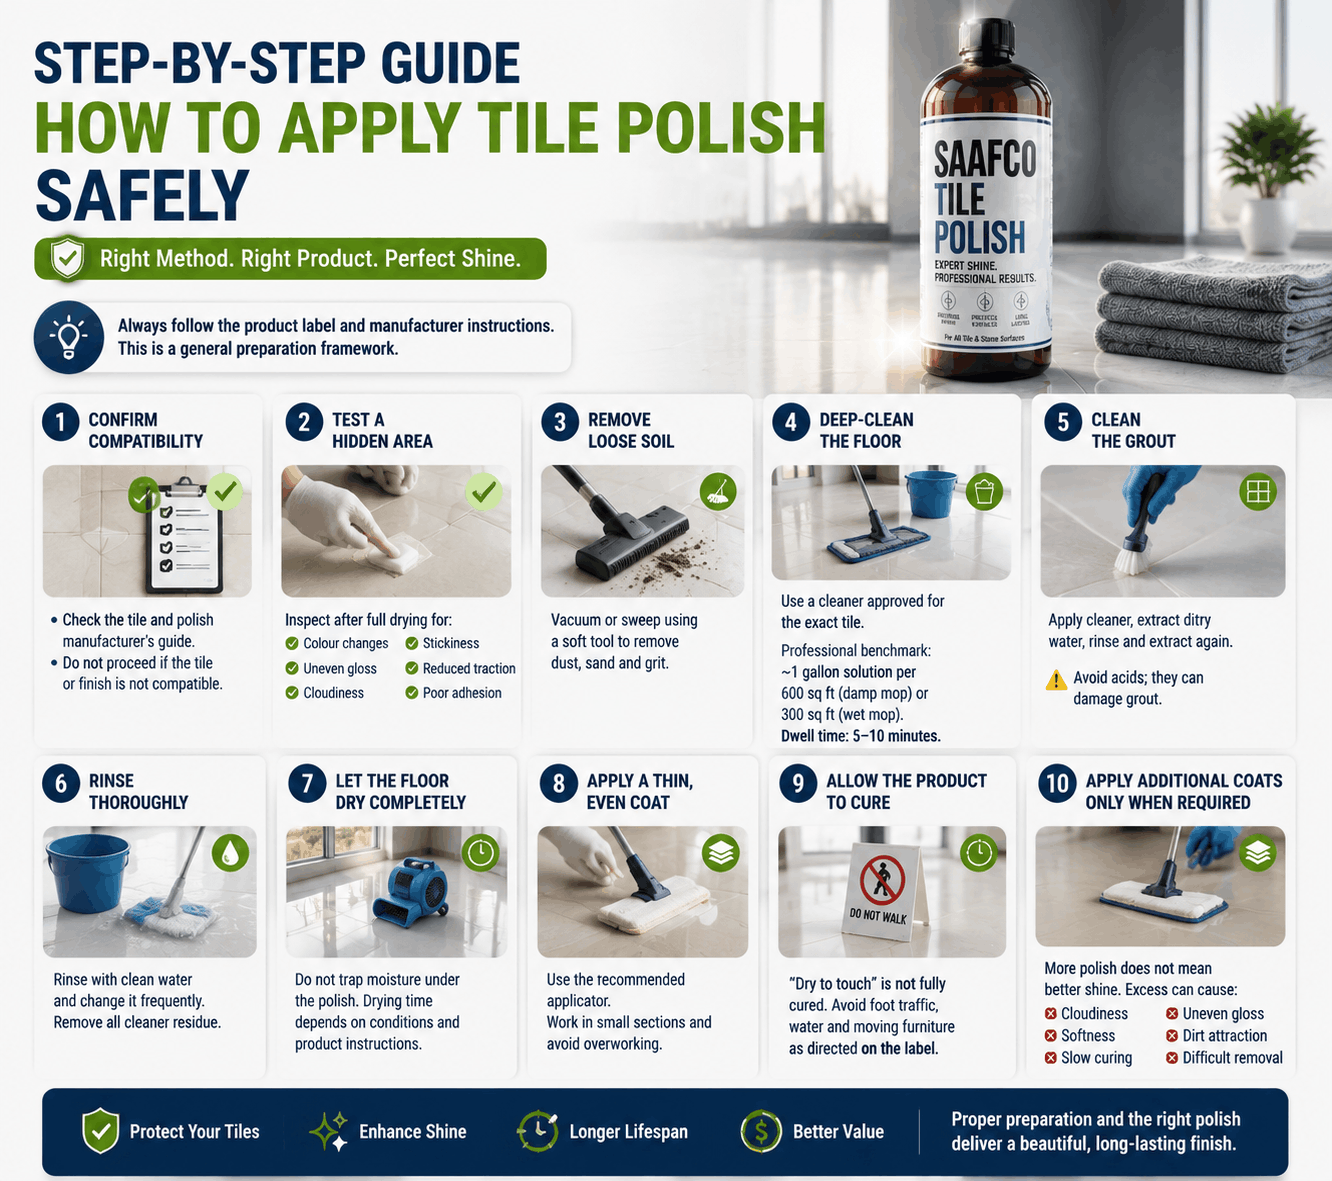
Step-by-Step Guide: How to Apply Tile Polish Safely
Always follow the selected product’s label. The following process is a general preparation framework rather than a replacement for manufacturer instructions.
Step 1: Confirm Compatibility
Check the tile manufacturer’s maintenance guide and the polish label.
Do not proceed when:
- The tile material is unknown
- The finish is anti-slip or matte and the polish adds gloss
- The product excludes wet areas
- The floor has loose tiles or damaged grout
- The tile manufacturer prohibits coatings
Step 2: Test a Hidden Area
Apply the complete process to a small, inconspicuous section.
Inspect after full drying for:
- Colour changes
- Uneven gloss
- Cloudiness
- Stickiness
- Reduced traction
- Poor adhesion
A successful wet appearance does not guarantee a successful cured finish.
Step 3: Remove Loose Soil
Vacuum or sweep using a soft tool. This prevents sand and grit from scratching the surface during wet cleaning.
Step 4: Deep-Clean the Floor
Use a cleaner approved for the exact tile.
Crossville’s commercial care guidance provides a useful professional benchmark: approximately one gallon of cleaning solution per 600 square feet for damp mopping and per 300 square feet for wet mopping, with a typical detergent dwell time of 5–10 minutes. These numbers are not universal household instructions, but they illustrate the importance of controlled dilution and adequate contact time.
Step 5: Clean the Grout
Dirty grout can make a polished floor look unfinished.
TCNA recommends lifting contaminated cleaning water out of grout instead of leaving it to dry back into the joints. Its guidance suggests applying cleaner, extracting the dirty water, rinsing and extracting again. It also warns that acids may damage grout and can ultimately make regrouting necessary.
Step 6: Rinse Thoroughly
Cleaner residue can interfere with polish adhesion and create haze. Use fresh water and change it frequently.
Step 7: Let the Floor Dry Completely
Do not trap moisture beneath a film-forming coating. Drying time depends on humidity, ventilation, grout porosity and product instructions.
Step 8: Apply a Thin, Even Coat
Use the recommended applicator and work in manageable sections. Avoid repeatedly passing over areas that have started drying because this can create drag marks.
Step 9: Allow the Product to Cure
“Dry to touch” is not always the same as fully cured. Restrict foot traffic, water exposure and furniture placement for the period stated on the label.
Step 10: Apply Additional Coats Only When Required
Some products require one coat; others need several. More polish does not automatically create better shine. Excess material can produce:
- Cloudiness
- Softness
- Slow curing
- Uneven gloss
- Dirt attraction
- Difficult removal
Common Tile-Polishing Mistakes
Applying Polish to a Dirty Floor: This traps soil and grease beneath the coating.
Treating Every Tile as Ceramic: Marble, granite, porcelain, and glazed ceramic require different maintenance.
Using Acidic DIY Mixtures on Natural Stone: Vinegar and other acids can etch marble and similar calcium-based stones.
Using Too Much Detergent Before Polishing: Excess cleaner may leave a film that reduces adhesion.
Applying Polish to Textured or Anti-Slip Tile: The product may collect in low areas and affect traction.
Ignoring the grout: Bright tiles with dark, stained grout still look poorly maintained.
Mixing Cleaning Chemicals: Never combine bleach with ammonia. The Natural Stone Institute warns that this mixture creates a toxic and potentially lethal gas.
Using Abrasive Pads Without Approval: Abrasives may remove glaze, scratch polished porcelain or alter the reflection pattern.
Applying a New Product Over an Unknown Old Coating: Different coatings may not bond to each other. Strip or identify the old finish first.
DIY Tile Polish vs Professional Polishing
| Factor | DIY application | Professional service |
| Best for | Small, compatible areas | Large, damaged or high-value floors |
| Initial cost | Usually lower | Higher |
| Skill required | Basic to moderate | Specialist |
| Equipment | Cloth, mop or applicator | Rotary machines, pads and extraction tools |
| Risk | Uneven coat or wrong product | Lower when contractor is qualified |
| Suitable damage | Minor dullness | Etching, scratches and widespread wear |
| Finish consistency | Depends on user | Usually more uniform |
| Time | Can be slow | Faster for large areas |
Professional treatment is preferable when the surface is natural stone, previously coated, badly scratched, uneven, historically valuable or located in a large commercial area.
Real-World Selection Examples
Example 1: Glossy Kitchen Wall Tiles
Problem: Grease and cooking vapour have made the tiles appear dull.
Best first action: Degrease, rinse and dry.
Polish needed? Often no. The original glaze may return once residue is removed.
Example 2: Dull Polished-Porcelain Living Room Floor
Problem: Cloudy appearance after repeated mopping.
Best first action: Remove detergent residue using the manufacturer-approved method and fresh rinse water.
Polish needed? Not until cleaning, tile identification, and sealing requirements have been checked.
Example 3: Etched Marble Bathroom Vanity
Problem: Dull rings appeared after acidic cleaner use.
Best first action: Stop using acidic products.
Polish needed? A marble-specific polishing process or professional restoration may be required. Generic tile polish may only mask the problem temporarily.
Example 4: Matte Bathroom Floor Tiles
Problem: Owner wants a glossy finish.
Best first action: Keep the original matte, slip-conscious finish clean.
Polish needed? Usually not. Adding gloss may change traction and create uneven buildup.
Example 5: Commercial Marble Lobby
Problem: Traffic lanes have lost gloss.
Best first action: Professional inspection.
Polish needed? Likely mechanical honing, polishing, or a professional maintenance programme rather than a small household shiner.
Maintaining Shine After Polishing
Remove Dry Soil Frequently: Dust and grit cause surface wear.
Use the Correct Cleaner: Choose pH-neutral or manufacturer-approved products wherever appropriate.
Measure the Cleaner: Overconcentration leads to residue and streaking.
Use Clean Tools: Dirty mops, cloths, and pads redistribute soil.
Rinse When Required: Some products are no-rinse; others must be removed thoroughly. Follow the label.
Dry Wet Areas: A squeegee can reduce soap scum and mineral deposits in bathrooms. The Natural Stone Institute specifically recommends squeegeeing wet stone areas to limit buildup.
Use Entrance Mats: Mats reduce the amount of abrasive soil carried onto the floor.
Protect Against Furniture Scratches: Use clean, non-staining protective pads under furniture legs.
Reapply Only When Necessary
Do not follow a universal three-month or six-month polishing schedule. Reapplication should depend on:
- Product instructions
- Wear
- Traffic
- Cleaning method
- Surface condition
- Existing coating compatibility
Frequently Asked Questions
What is the best tile polish in Pakistan?
The best option depends on the tile material. A product suitable for marble may be unsuitable for ceramic or porcelain. Identify the surface, finish and problem before comparing brands.
Can ceramic tiles be polished?
Some compatible ceramic floors can accept a manufacturer-approved floor finish, but many glazed ceramic tiles need thorough cleaning rather than polish. Do not apply wax or coating without checking compatibility.
Can porcelain tiles be polished at home?
Polished porcelain receives its primary gloss during manufacturing. Home maintenance should normally start with correct cleaning and rinsing. Sealing or coating should follow the tile manufacturer’s instructions.
Is tile polish suitable for marble?
Only use products specifically designed for marble or natural stone. Acidic products can etch marble, while deeper damage may require professional re-polishing.
Does tile polish remove scratches?
A film-forming polish may make very fine surface marks less noticeable, but it does not repair deep scratches, damaged glaze, cracks or stone etching.
Can I use tile polish in a bathroom?
Only when the product is specifically approved for that tile and for wet floor conditions. Avoid coatings that may reduce traction.
How often should tiles be polished?
There is no universal schedule. Reapply according to the product label and the actual condition of the coating. Many ceramic and porcelain floors may not require routine polish at all.
Why do my tiles look dull after mopping?
Common causes include dirty water, excess detergent, soap film, hard-water deposits, grease and worn grout.
Can vinegar make tiles shine?
Vinegar may be tolerated by some ceramic or porcelain surfaces, but it can damage natural stone and grout. A manufacturer-approved neutral cleaner is the safer general approach.
Is tile sealer the same as polish?
No. A sealer primarily reduces absorption and staining, while polish generally improves or refreshes gloss. Some products combine functions, but their labels should explain this clearly.
How can I clean grout without damaging it?
Use a grout-compatible cleaner, agitate gently, extract or remove the dirty liquid, rinse, and remove the rinse water. Avoid strong acids unless specifically approved.
Final Buying Advice
Before purchasing tile polish in Pakistan, remember this rule:
Choose the product according to the surface—not according to the word “tile” on the label.
For glazed ceramic and porcelain, first remove dirt, grease, detergent residue, and hard-water marks. For polished porcelain, confirm whether a sealer is required. For marble and granite, use stone-specific products and professional restoration where the surface is etched or deeply scratched. For matte and anti-slip floors, preserve the intended finish rather than forcing artificial gloss.
A safe buying decision should consider:
- Tile material
- Existing finish
- Indoor or outdoor location
- Wet-area safety
- Product coverage
- Drying and curing time
- Maintenance requirements
- Removal procedure
- Price per usable area
- Manufacturer compatibility
The best result is not simply the shiniest floor. It is a clean, even, safe and properly maintained surface whose finish suits the material and location.